Sculptures in the Garden - Mudgee 2023
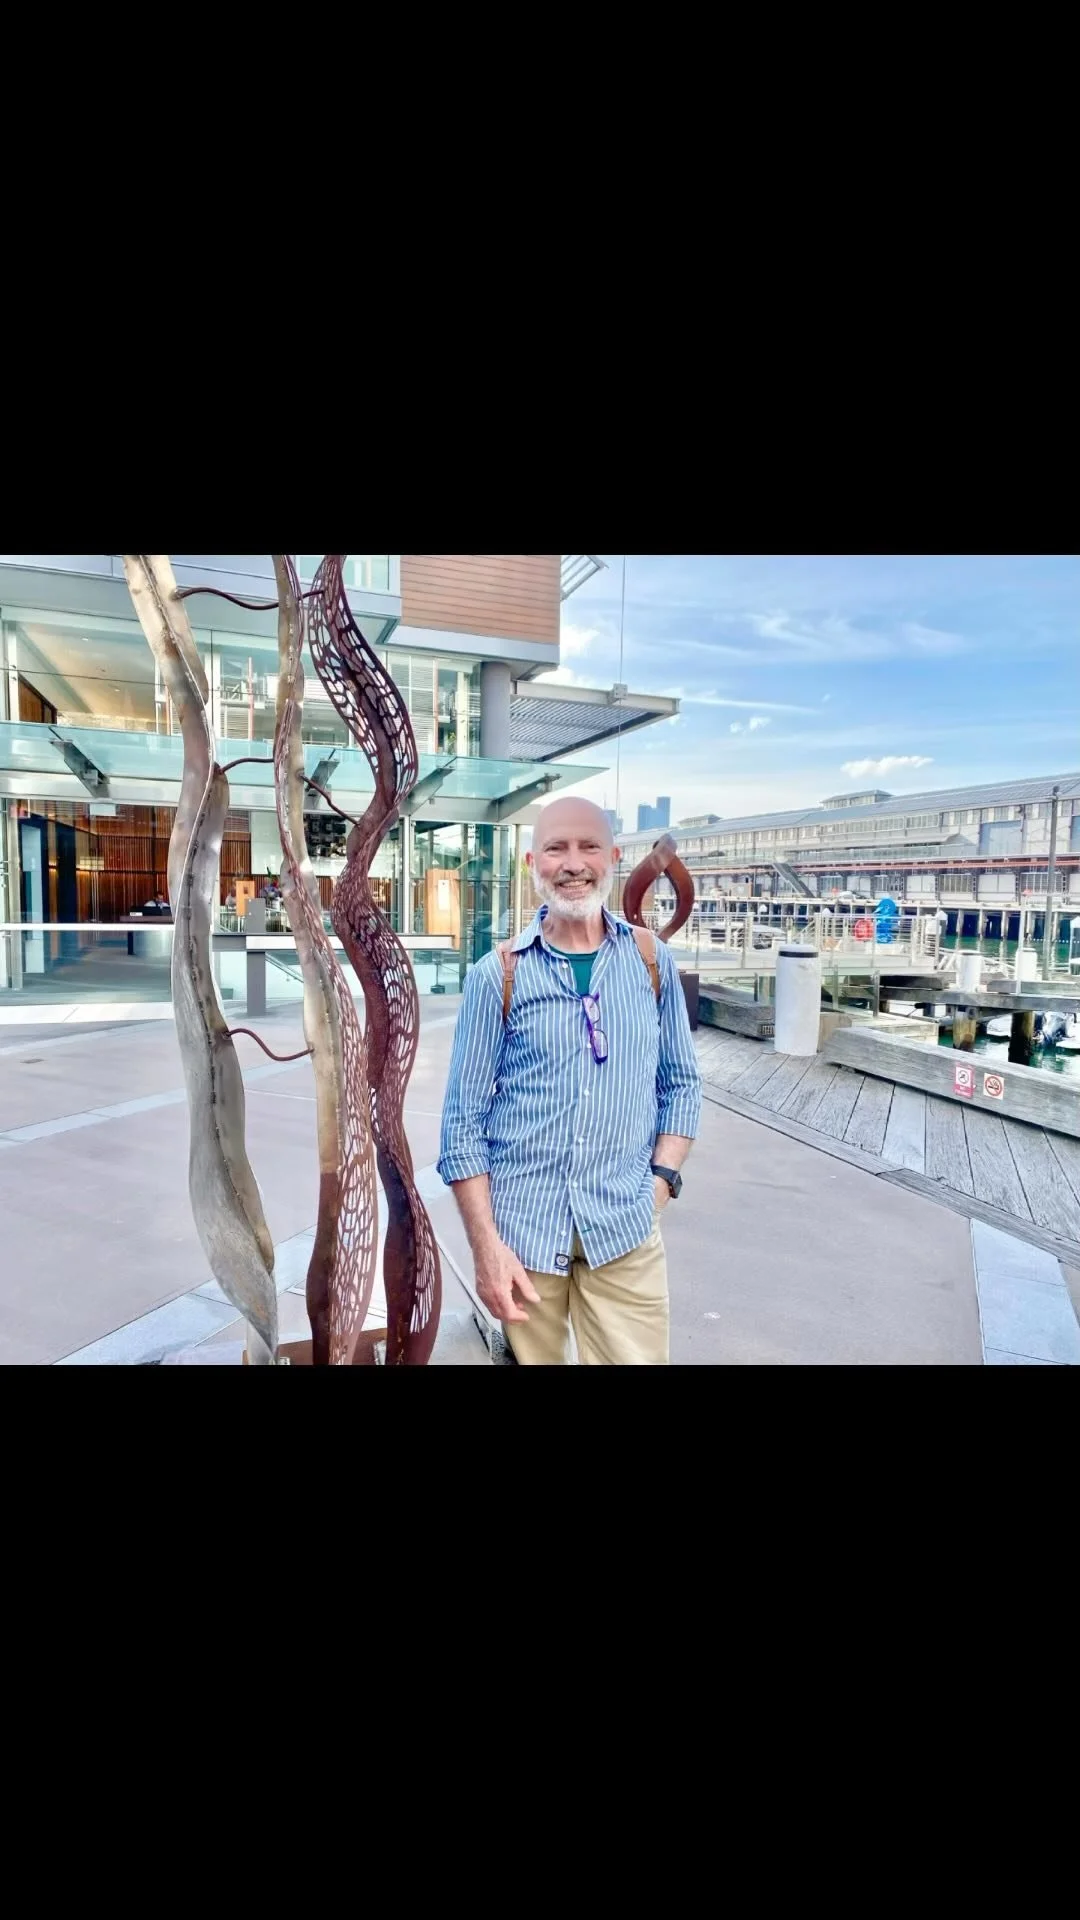
I am excited to share that three of my sculptures will be on display at the 2023 Sculptures in the Garden competition/exhibition. This is my debut at this event, and I am looking forward to admiring the magnificent artwork of my fellow artists.

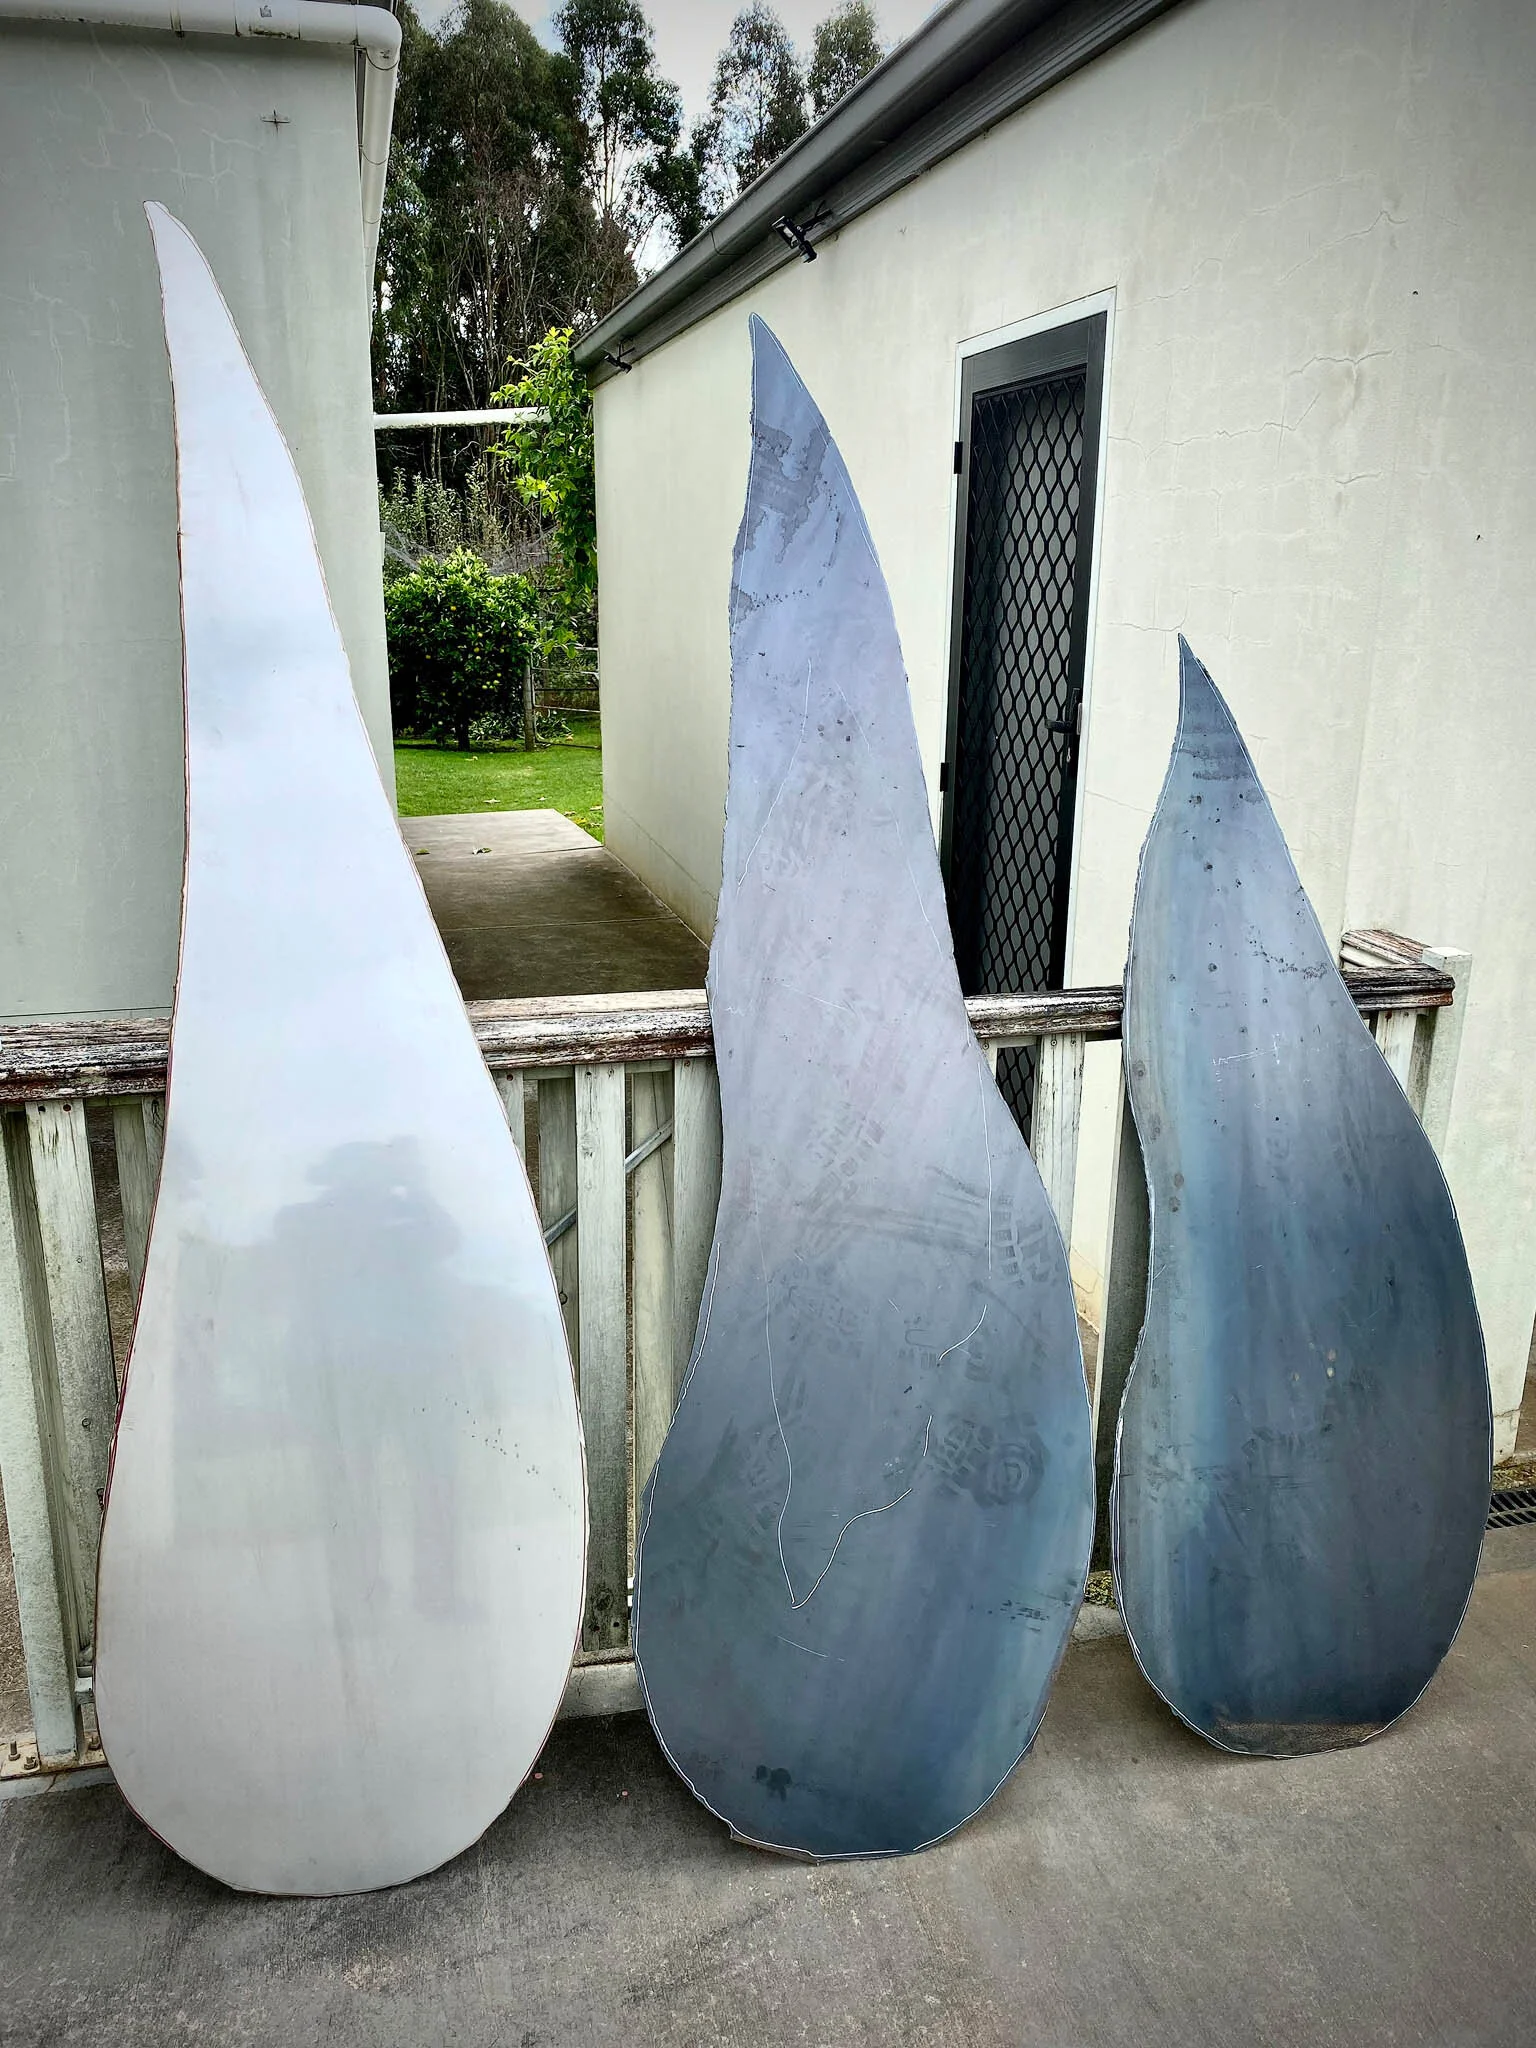
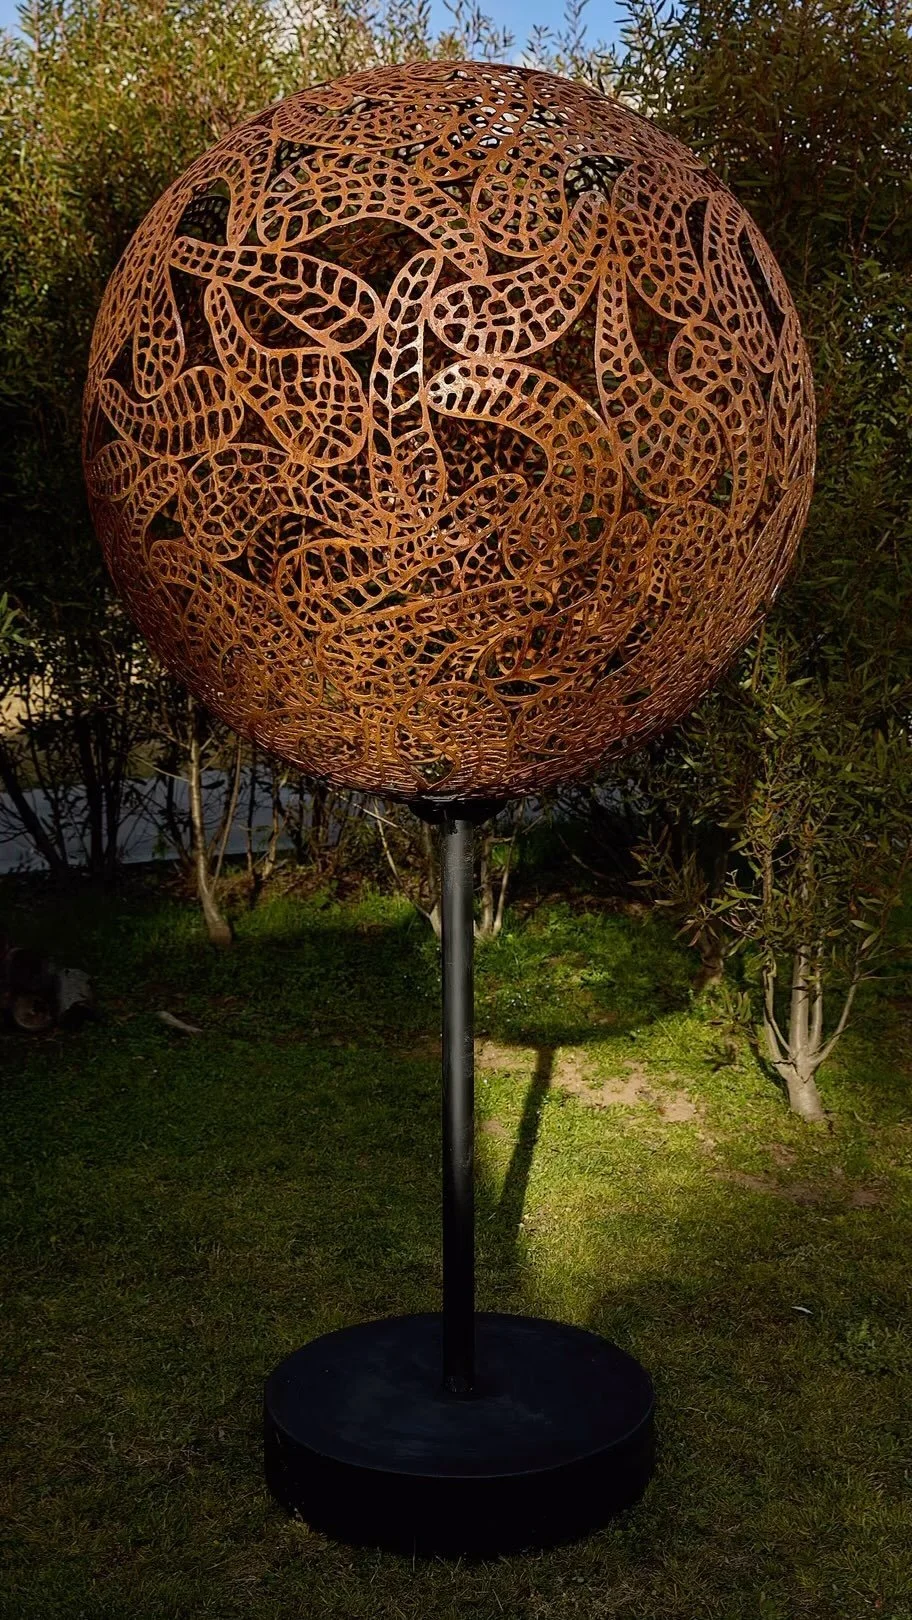
Skeleton Gum Leaf Sculpture
It started out as a simple gum leaf, but as I drew the design on the sheet of metal I wanted more and more detail…
Well it started as a idea with some gum leaves in the back yard. I just loved the various shapes of short fat ones and elongated ones with bulbous end and elegant curves. Originally I thought of a trio of leaves with that series of shapes.


Then as I started to complete a concept sketch, I extended the brief to portray leaves as decayed skeletons. Not one to do anything by halve-measures, I then thought I would like to also convey a sense of the decay by showing one leave very skeletonised, then the next not as much, and the final leaf only starting to decay.

original Concept
This starting idea helped me formulate building my first sculpture. Various design and artistic choices had to be made along the way. This process felt very organic and my sculpture definitely reflects this.
To further emphasise this theme, I also decided to use different materials. The first leaf would be made from Corten steel and thus have a very rusted finish. The last leaf would be bright shiny stainless steel. Finally, the transition leaf would be a hybrid of both Corten and stainless.


Initially, I thought that I would use some CAD to design the layout, but given the tallest leaf would be around 2.4m tall (the length of my sheets of steel) this was not going to translate from screen to real life!
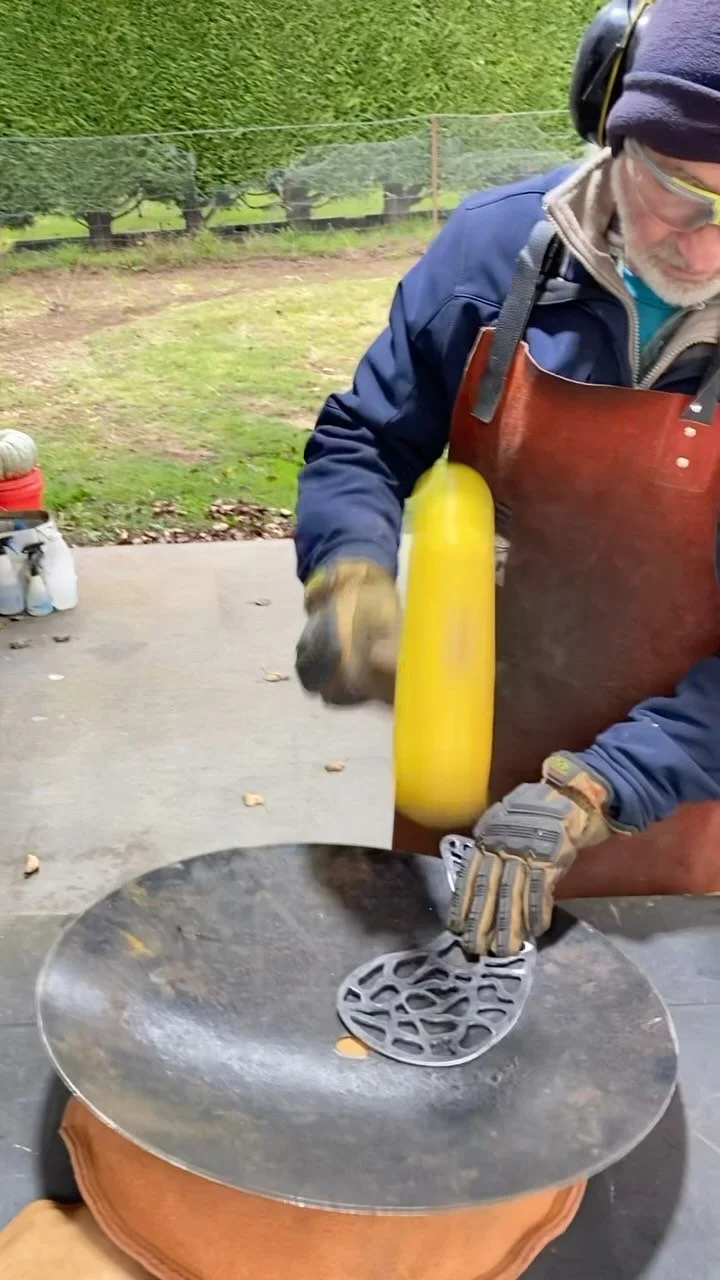
So, I just grabbed a Sharpie pen and started to draw shapes on the sheets of metal. I got up close, I stood back. I walked around the table and anywhere a curve or shape did not look quite right I got a bit of acetone and rubbed that bit out and redrew the outline.
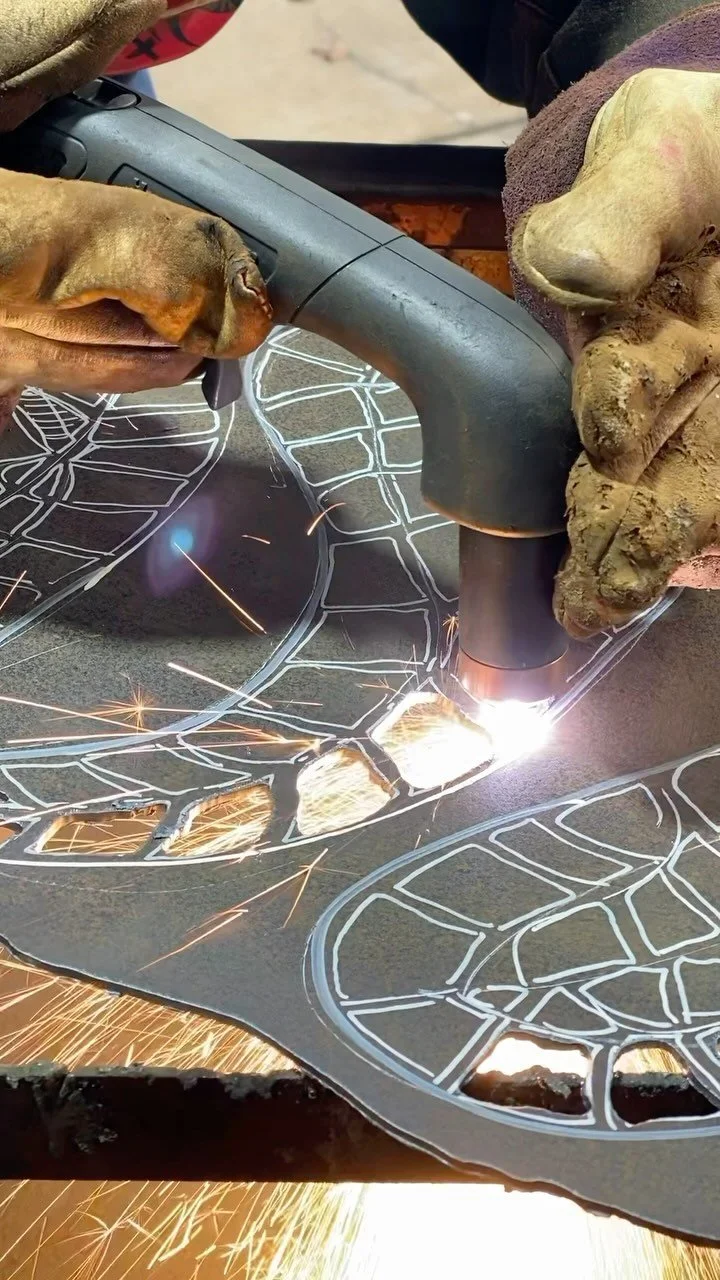
Naturally, the plasma cutter made short work of cutting out the sheets. I must admit it was quite refreshing to just “go with the flow” and rely on aesthetics as the primary design criteria.
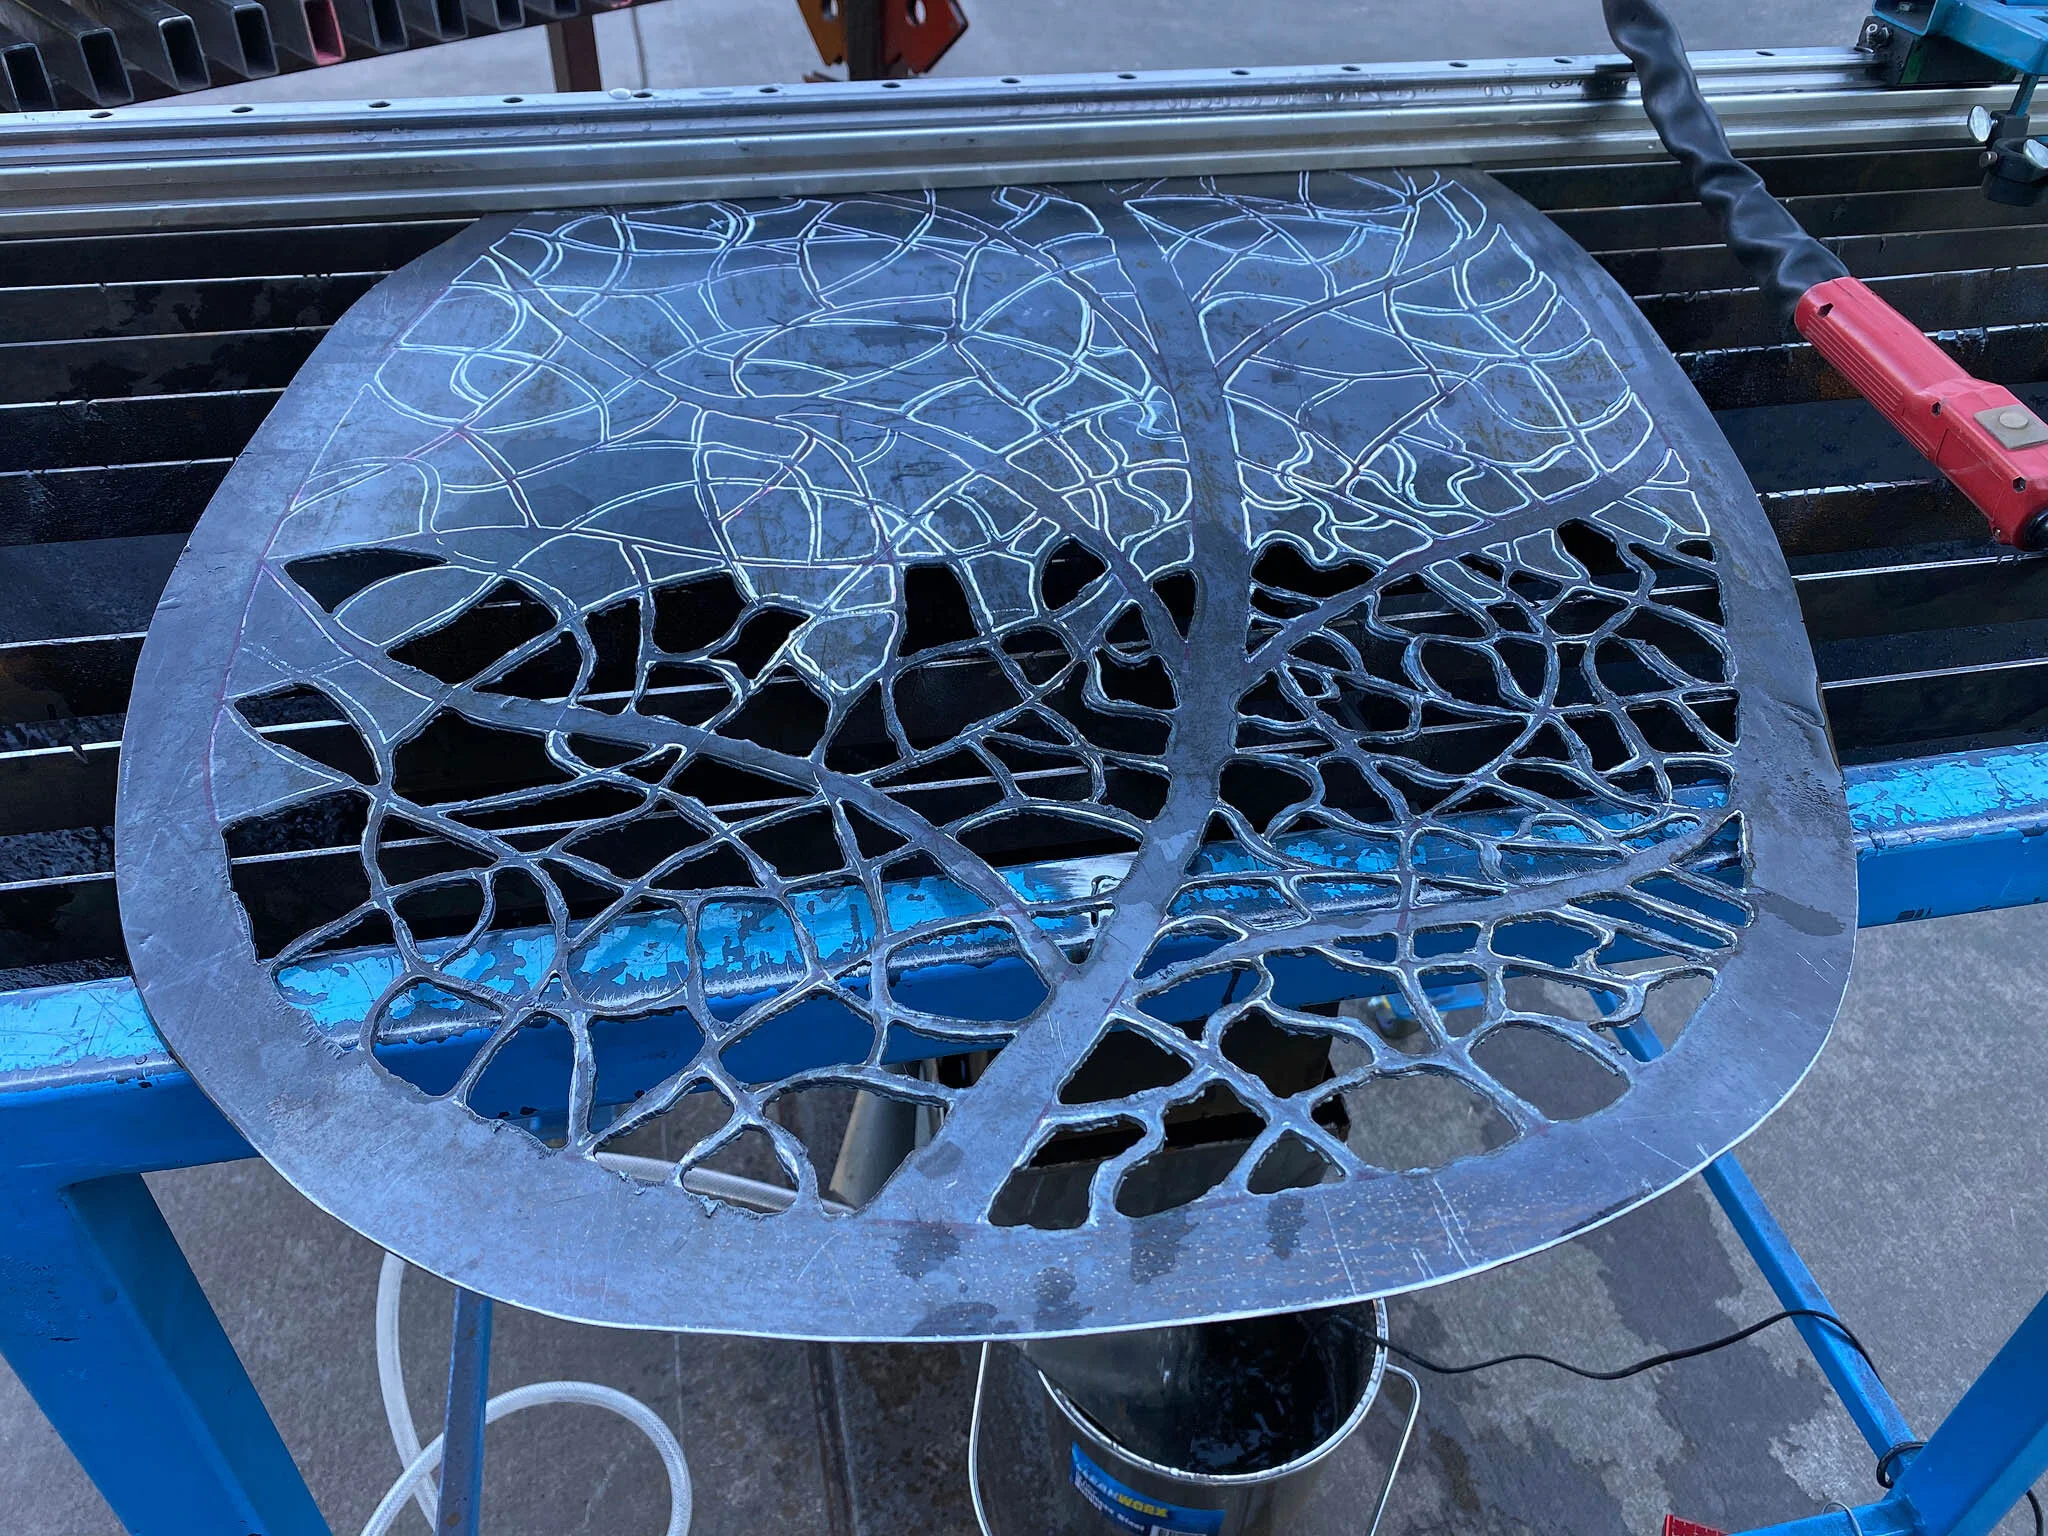
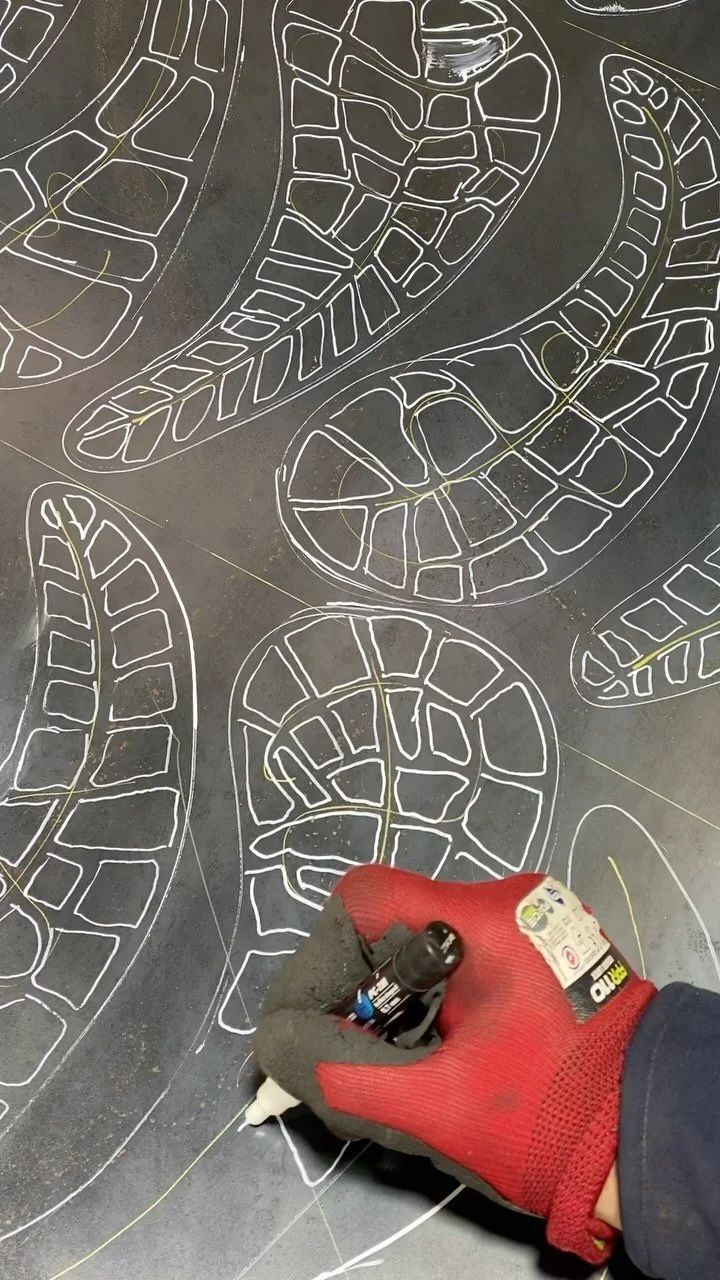
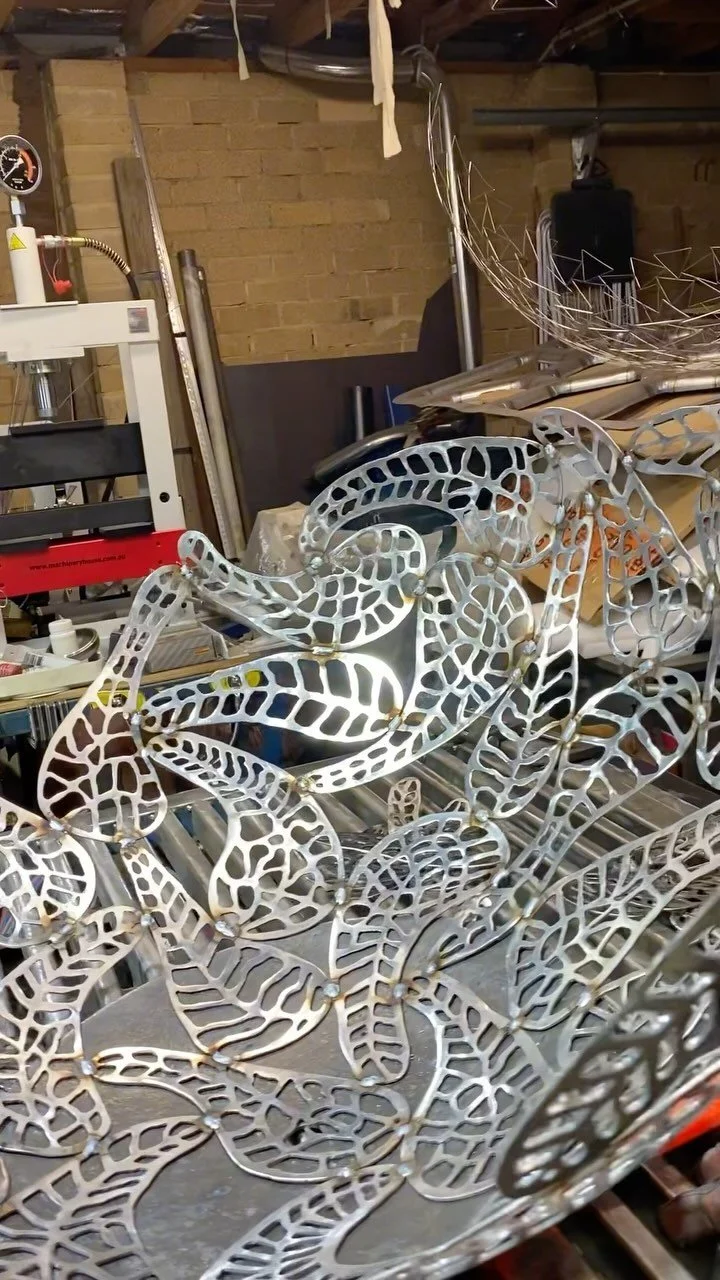
The next step was to layout pattern for plasma cutting. Again, I just grabbed a texta and started “doodling”. I wanted a base of the main leaf stem and veins. I then filled in with curvy shapes. Later, I added another overlay of undulating curves that I then used to intersect the base curves. The first leaf has so much cut out of it that it is at first hard to see, but the all the shapes seem to have a harmony about them and it is this connecting overlay that creates it.
After getting a design I was happy with, I traced over the lines with a white paint-pen. I prefer the white as using the plasma cutter still requires the use of a welding helmet (on low darkness, not welding darkness) and the lines are still easy to see.


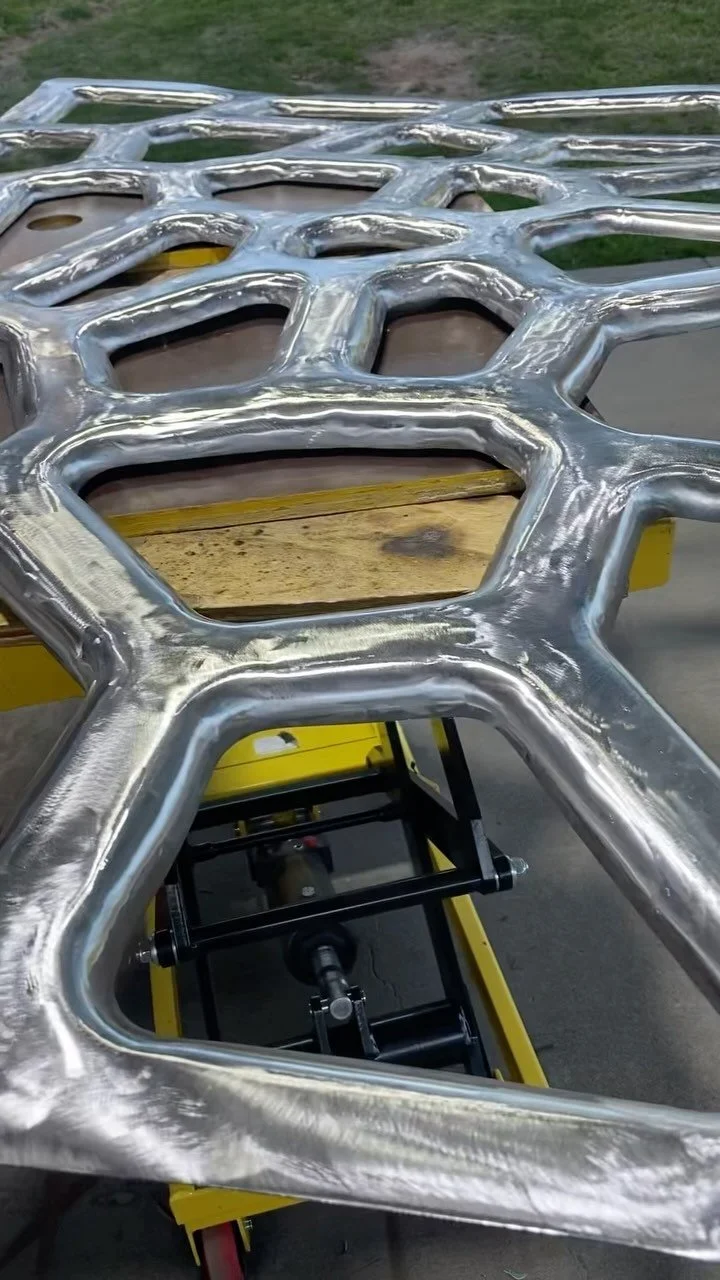
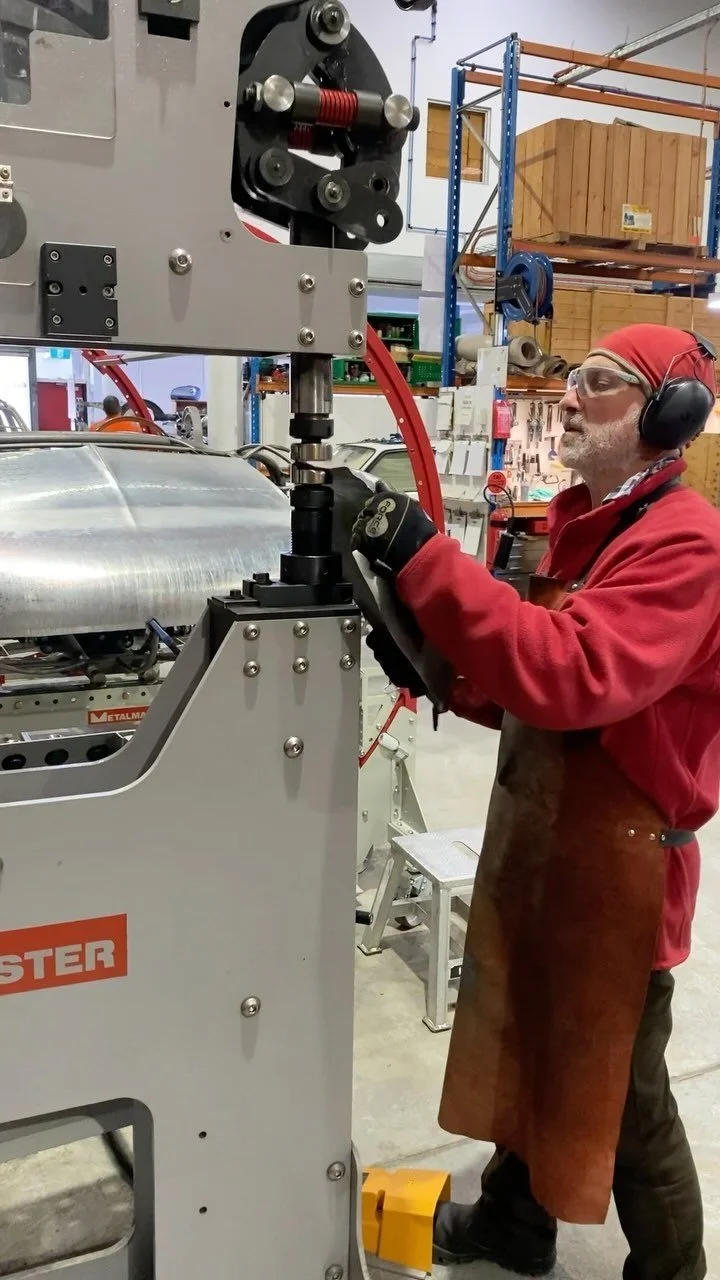
I wanted the leaves to have gentle curves so I rolled sections of the metal in my slip roller. This gave a beautiful wave in the leaf, but also created some unstableness once the cutting was completed. To reinforce each leaf, I cut a tapered section of metal and welded it down the spine. This was a bit tricky as I had to allow for the waves of the leaf, but also a bend in the spine. This is where some scrap cardboard came in handy as a template to get close to the final shape.
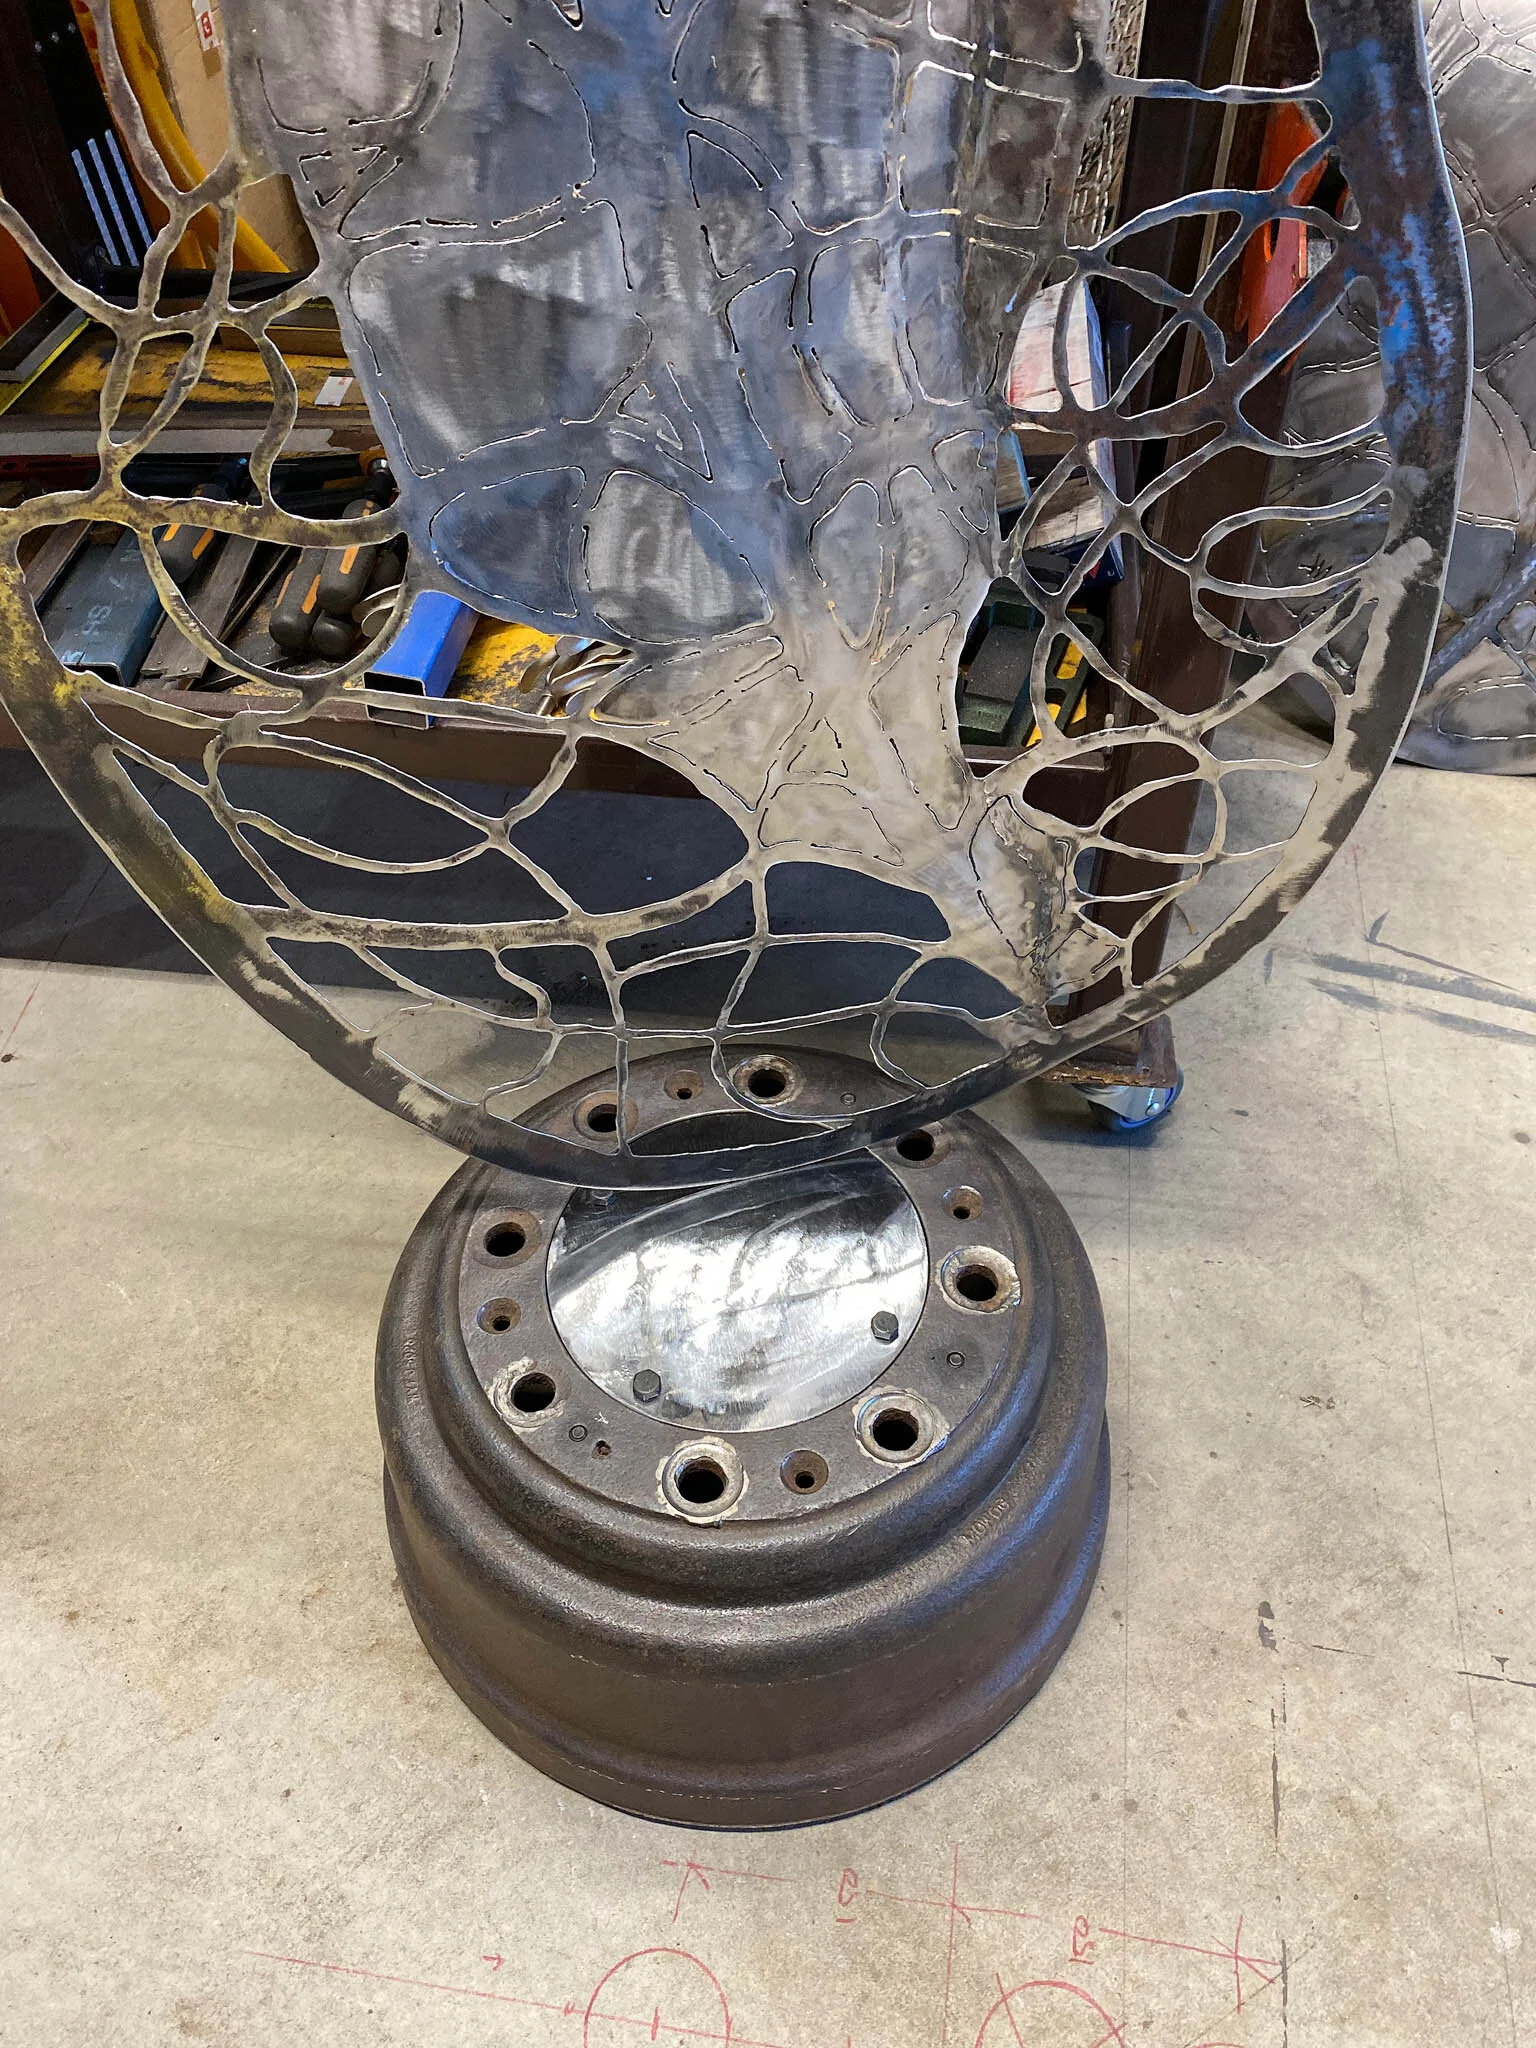
The last technical problem to overcome was how to make it free-standing, but also portable. It needs to be located in a studio, but also not to fall over! I had recovered some old truck brake drums. These are cast iron and probably weigh 40-50kg. On a trolley, they can be moved, and once put down, they definitely do not move! I fabricated a circular plate with reinforcing cross bracing that screwed into existing threaded holes using high-tensile bolts. To this plate, I made a matching plate that is the base of the sculpture. The two plates were drilled and tapped so that they could be bolted together (again with high-tensile bolts).
I then assembled the leaves onto the circular base carefully making sure that all three leaves fitted and flowed together as I wanted. I then welded the leaves to the base plate. Since I had cut so much metal out, the leaves still had a bit of wobble (despite the tapered spines), so I added a few tapered cross pieces as bracing between each leaf. Now scultpure just sways a tiny bit in the wind.


Anvil
A long-term sculpture project that I want to make will involve bending steel into round shapes so naturally, I thought getting an anvil makes sense. What I did not realise is that anvils are now a fashion statement for interior decoration. A good old fashioned one now can fetch up to $3000!!
I went with a cheap import at one-tenth of that. I have wacked it with a big hammer and my first impressions are that it will be quite serviceable. Making up the stand from a bit of old railway sleeper was a welcome distraction in all the torrential rain this week and also trying to get the grass cut today now that it is sunny.
The third photo shows the detail of the clamps I custom made to attach it to the base. The last photo shows the base & the tricky shape formed by the two odd halves. As with all my gear it needs wheels to shuffle around to make space in the shed.
Still thinking about maybe a trailer jockey wheel on the front...


Slip Roller
I bought a 600mm wide slip roller, but it needed a stand. Read more about it here
Plasma Table
To cut efficiently and safely with the plasma you really need a proper plasma table. so I built one. Read more about it here
Welding Table
Its hard being bent over and welding on a concrete slab. Time to build a decent welding table. Read more about it here
TIG welding trolley
My first welding project with the TIG welder was to build a trolley for it. Read more about it here

Latest Projects


